🚀 Deploying flux0 to Koyeb
Koyeb is a great platform for hosting Flux0 in the cloud with minimal setup.
it is a great choice for hosting production-ready flux0 agents with zero infrastructure overhead.
This guide walks you through deploying Flux0 via GitHub as a Koyeb service.
🌟 Why Koyeb?
Koyeb is a great match for flux0 agents. Here's why:
-
Git-powered deploys Push your agents to GitHub and Koyeb deploys it automatically — no CI/CD needed.
-
Built-in secret management Store API keys like
OPENAI_API_KEYsecurely as environment variables. -
Zero infrastructure No servers, no containers — just your agents code running in the cloud.
-
Global performance Agents run behind a CDN and auto-scale with traffic, out of the box.
-
HTTPS & custom domains Every agent is live on HTTPS by default, with custom domain support.
Koyeb handles the deploys, flux0 handles the rest — from multi-agent logic to session state and LLM calls. You focus on agent behavior, hit git push, and it’s live.
🧾 What You’ll Need
- A GitHub repository with your
flux0app - A Koyeb account
- Python 3.13+ compatibility
- LLM (e.g, OpenAI) API key
🚀 Deployment Steps
🔐 Step1: Create a Secret
To securely store sensitive values as the API key:
- Go to your Koyeb Dashboard.
- Navigate to Secrets in the sidebar.
- Click "Create Secret".
- Name your secret (e.g.,
openai-api-key) and paste the value. - Save it.
🧠 Step2: Agent Logic
Your agent logic should live inside a folder under modules, for example modules/my_agent.
Step 3: Push to GitHub
Make sure your flux0 app is in a public or private GitHub repository.
You can fork https://github.com/flux0-ai/flux0-docker-example with your agent code or use this repo directly in Koyeb for demonstration.
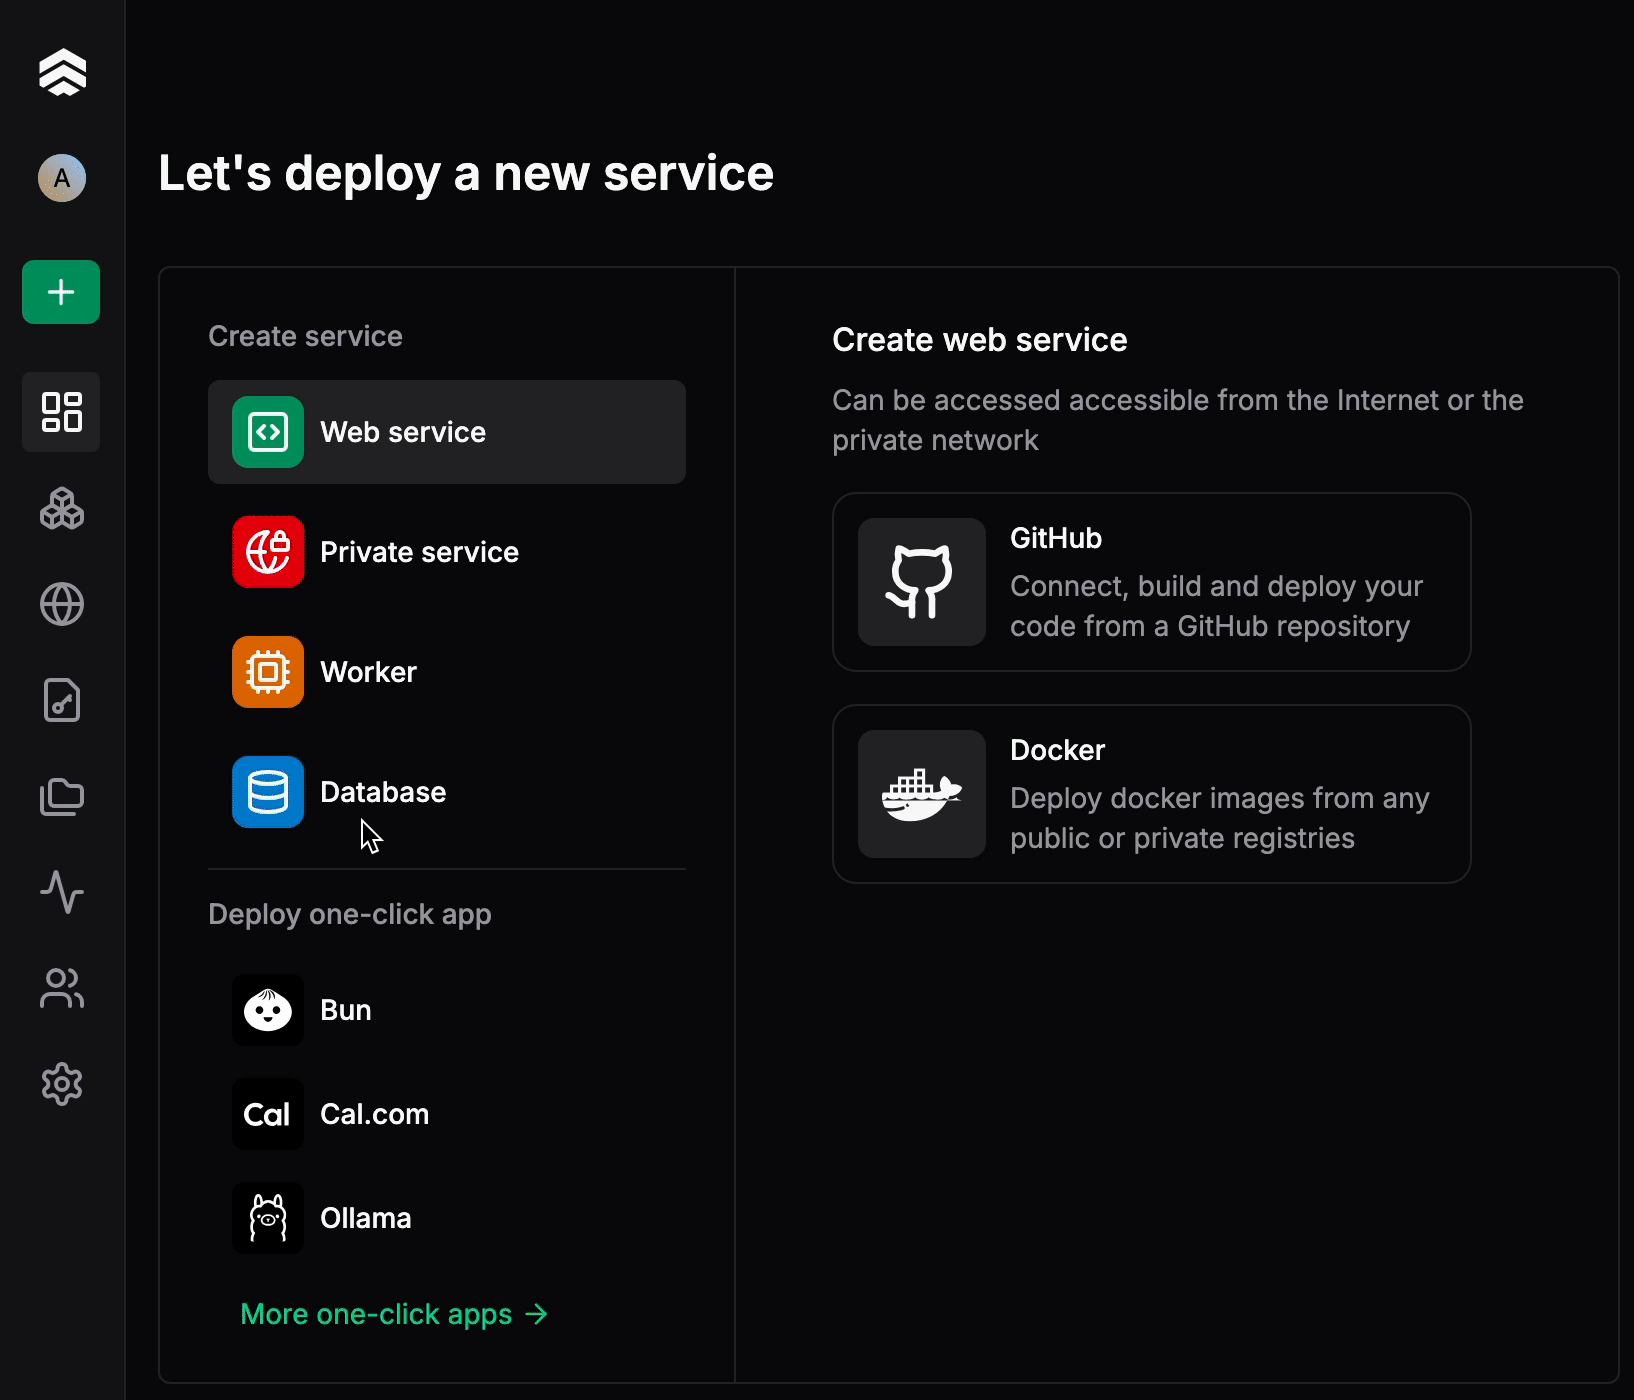
Step4: Create a Koyeb App (Service)
- Go to app.koyeb.com
- Click Create Service
- Choose:
- GitHub as your source
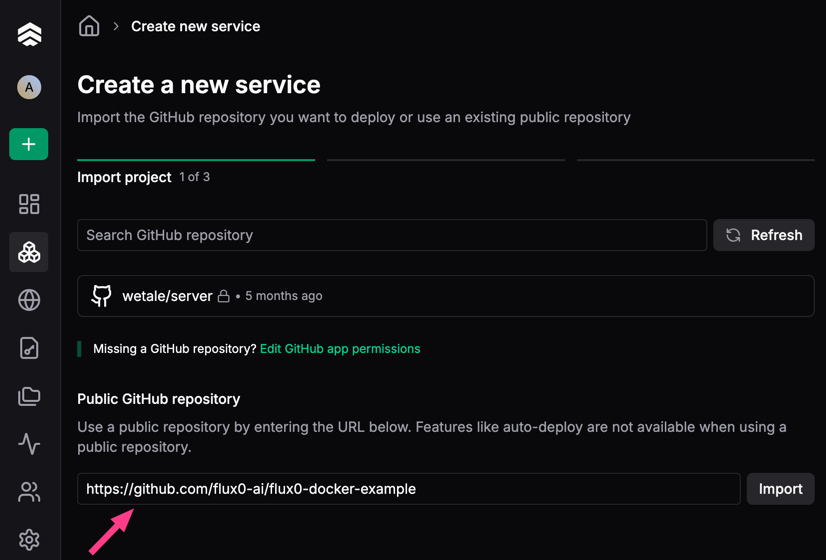
- The correct repository and branch (e.g., https://github.com/flux0-ai/flux0-docker-example)

Choose a repo
Connect your private repo or choose a public one and click import.
Configure service
Select a CPU of your choice and click Next (CPU Eco should be sufficient for demonstration purposes)
Builder
Define Builder to Dockerfile and leave all settings as default.
Environment variables
| Key | Example Value |
|---|---|
OPENAI_API_KEY | {{ secret.openai-api-key }} |
FLUX0_MODULES | my_agent |
Exposed Ports
Change port to 8080
✅ Step5: Verify Your Deployment
- Click Deploy
- Wait for the service to be deployed.
- Click the Public URL, you should see the chat interaface.
🧾 Step 6: Register the Agent
Once your runner is defined and your module is registered, you can create the agent entry in the database:
- Cick manage your service.
- Click Console and press Enter
flux0 agents create --name "Translation Agent" --type langchain_simple
💬 Step 7: Talk to Your Agent
Start chatting with your agent at the service URL.